
The complete guide
How to Choose a 15L Camera Backpack That Works in the Tropics
The problem with most camera bags
Most camera bags are designed by people who imagine a calm afternoon. You arrive, you unzip, you set up. Real shooting is messier than that. You are standing on a wet pavement outside a hawker centre, it has just started raining, your lens is on the wrong body, and the bag you need to open only opens from the top, which means putting it down in a puddle.
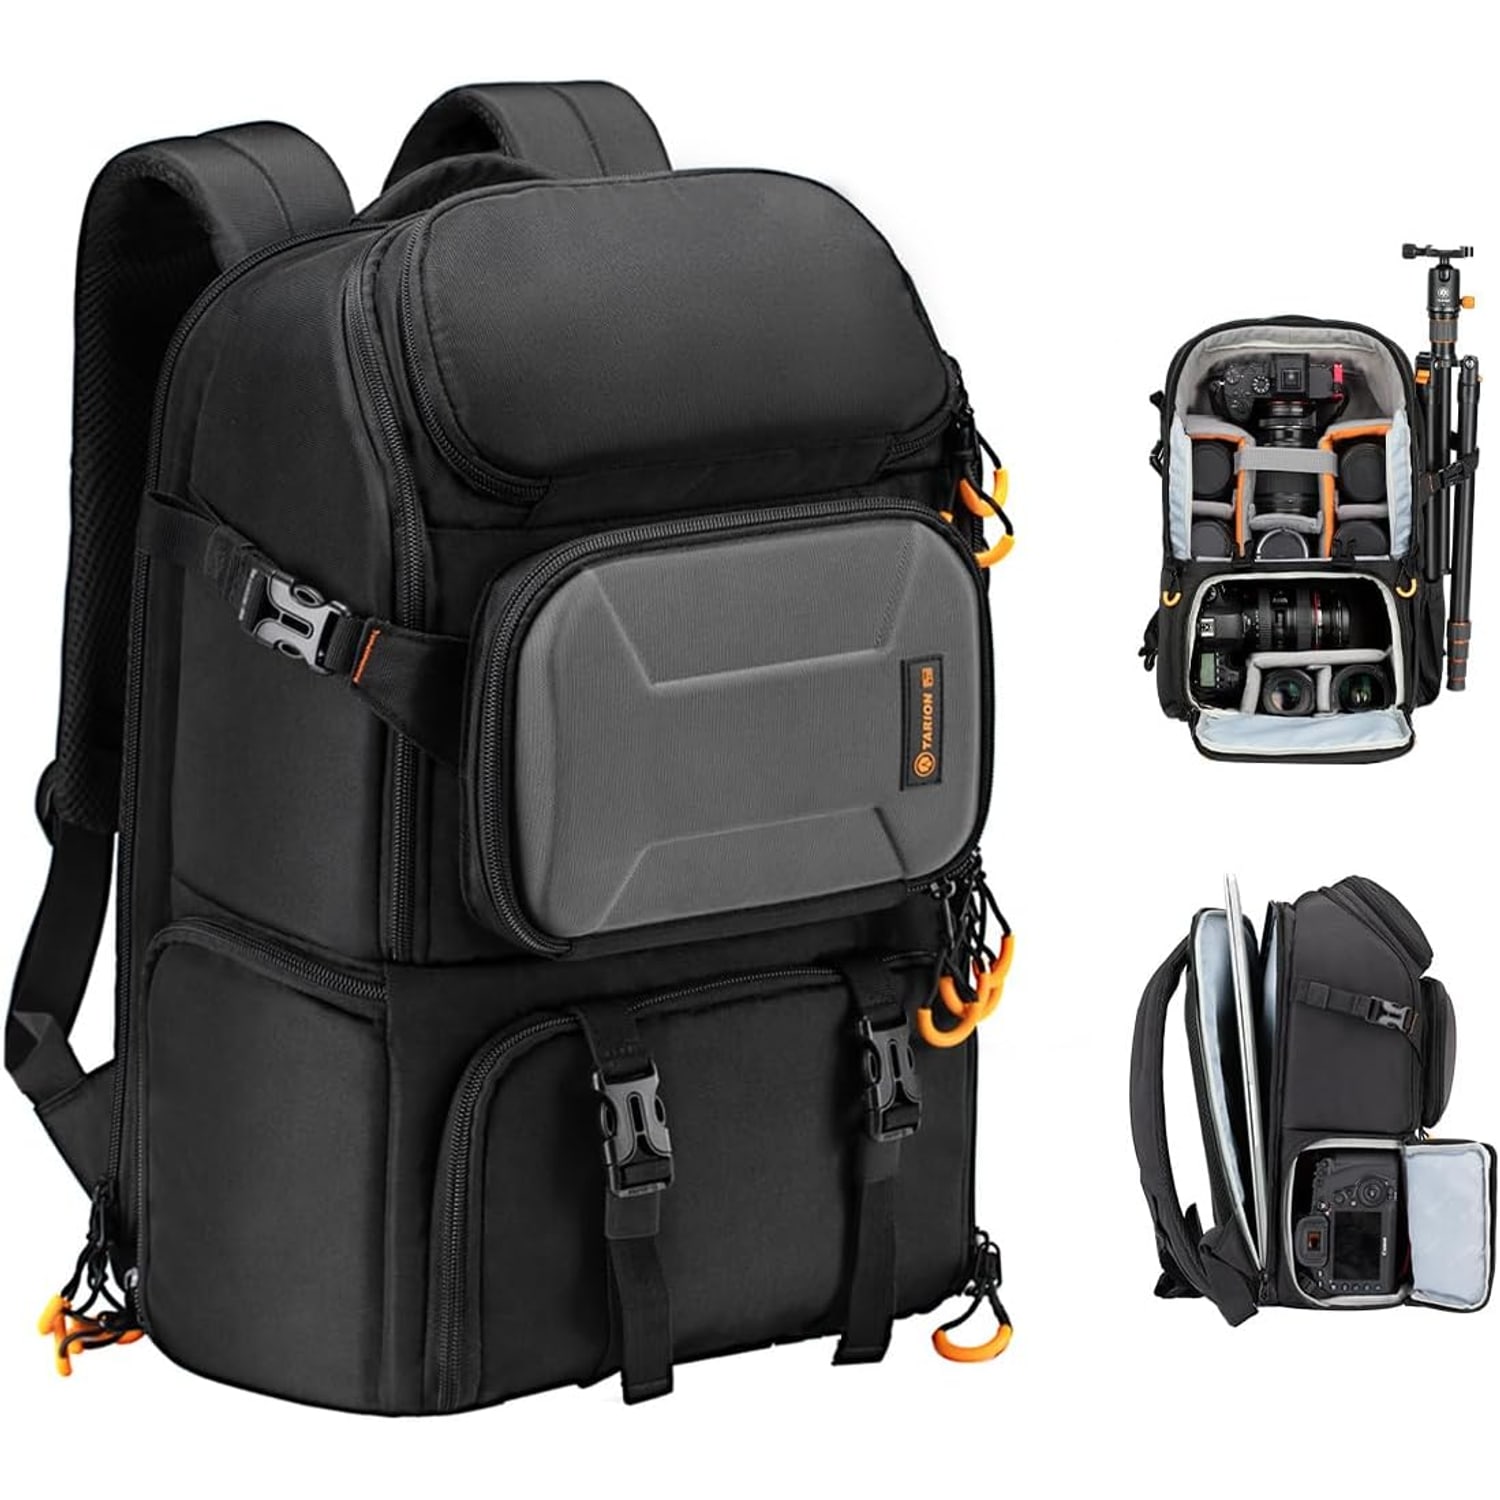
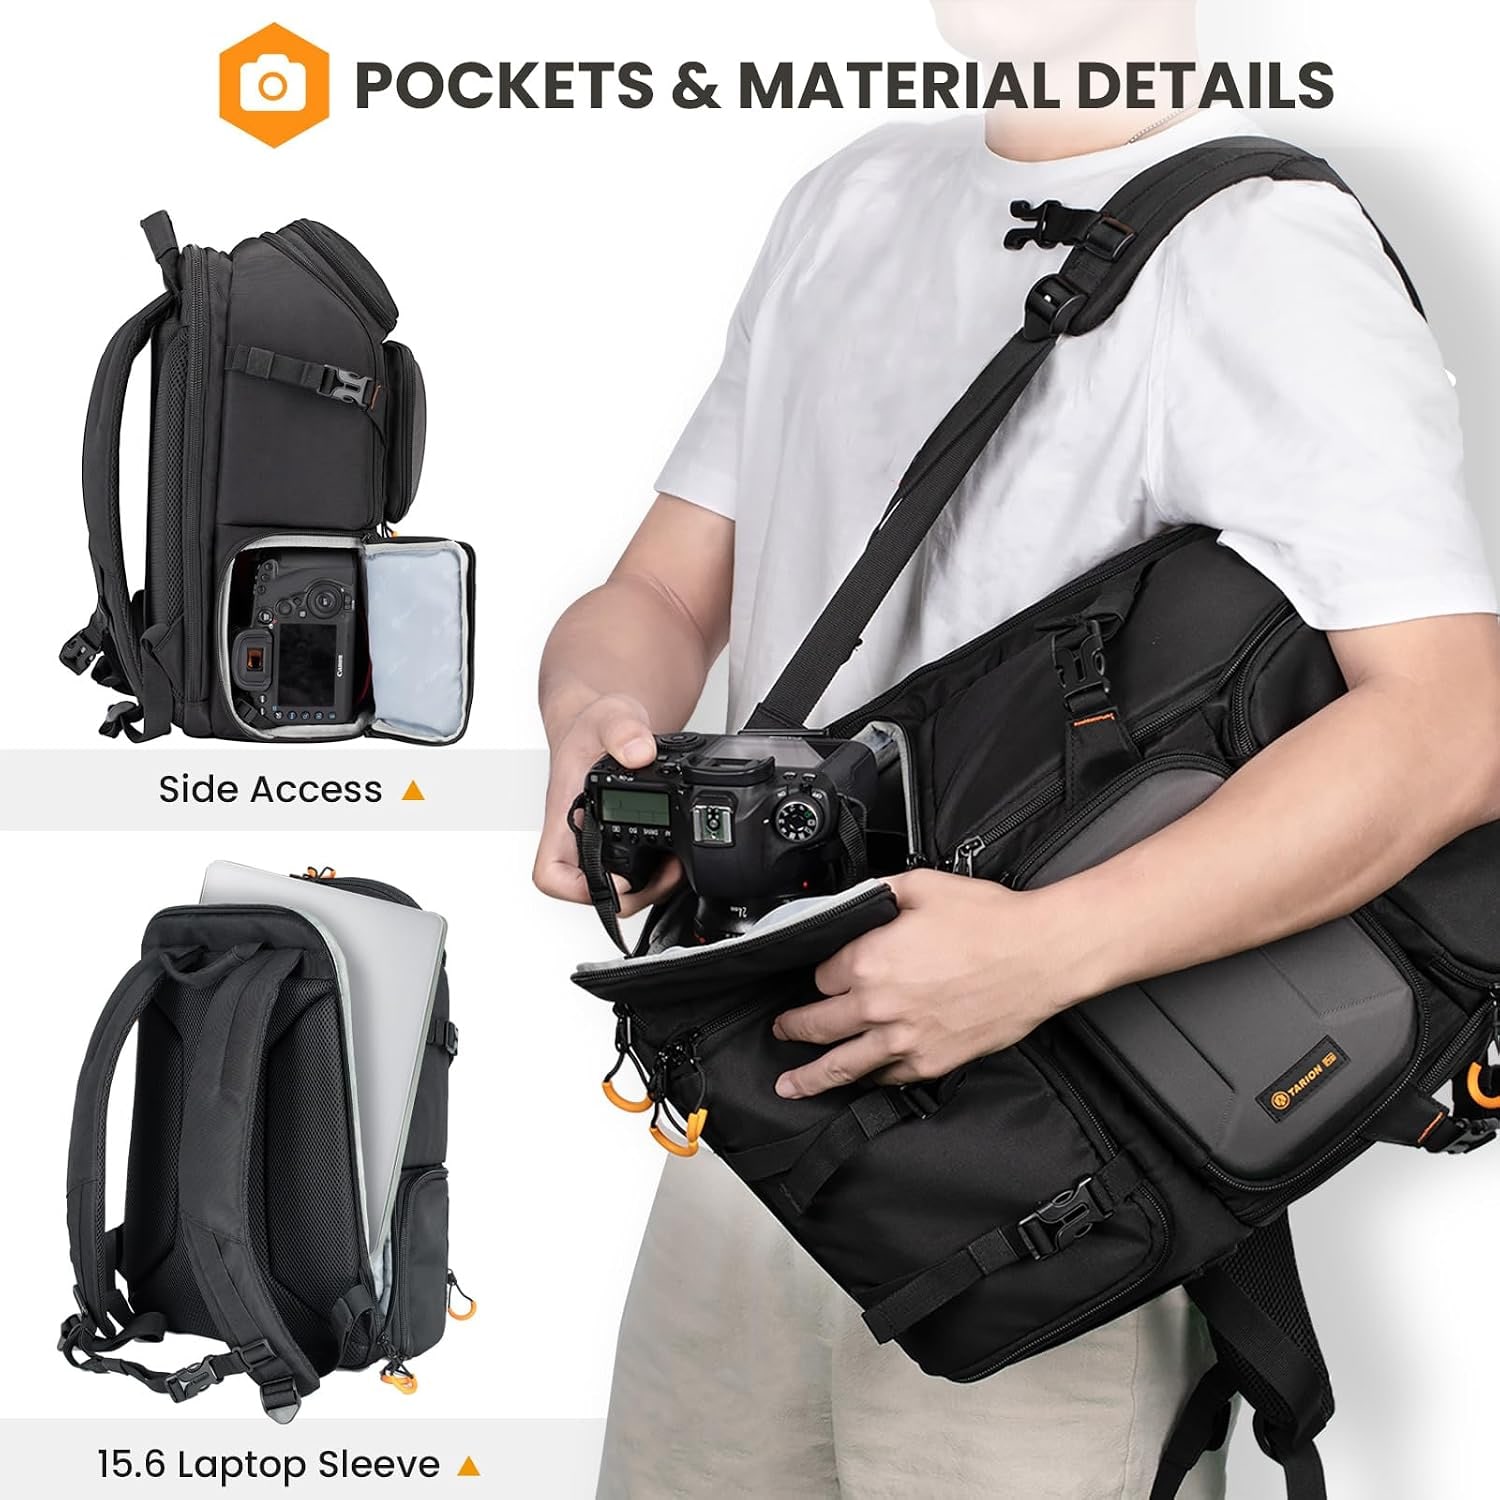
That is the specific frustration this 15L camera backpack is built around. The side access panel is not a gimmick. It is the difference between taking the shot and watching it go. You slip one strap, swing the pack to your front, pull the zip and your camera is in your hand while the bag is still on your shoulder.
The second problem is weather. In a climate where a clear sky becomes a downpour in under ten minutes, water resistant fabric on its own is only half an answer. A rain cover that lives in the bag and pulls over in seconds is the other half.
How the bag is put together
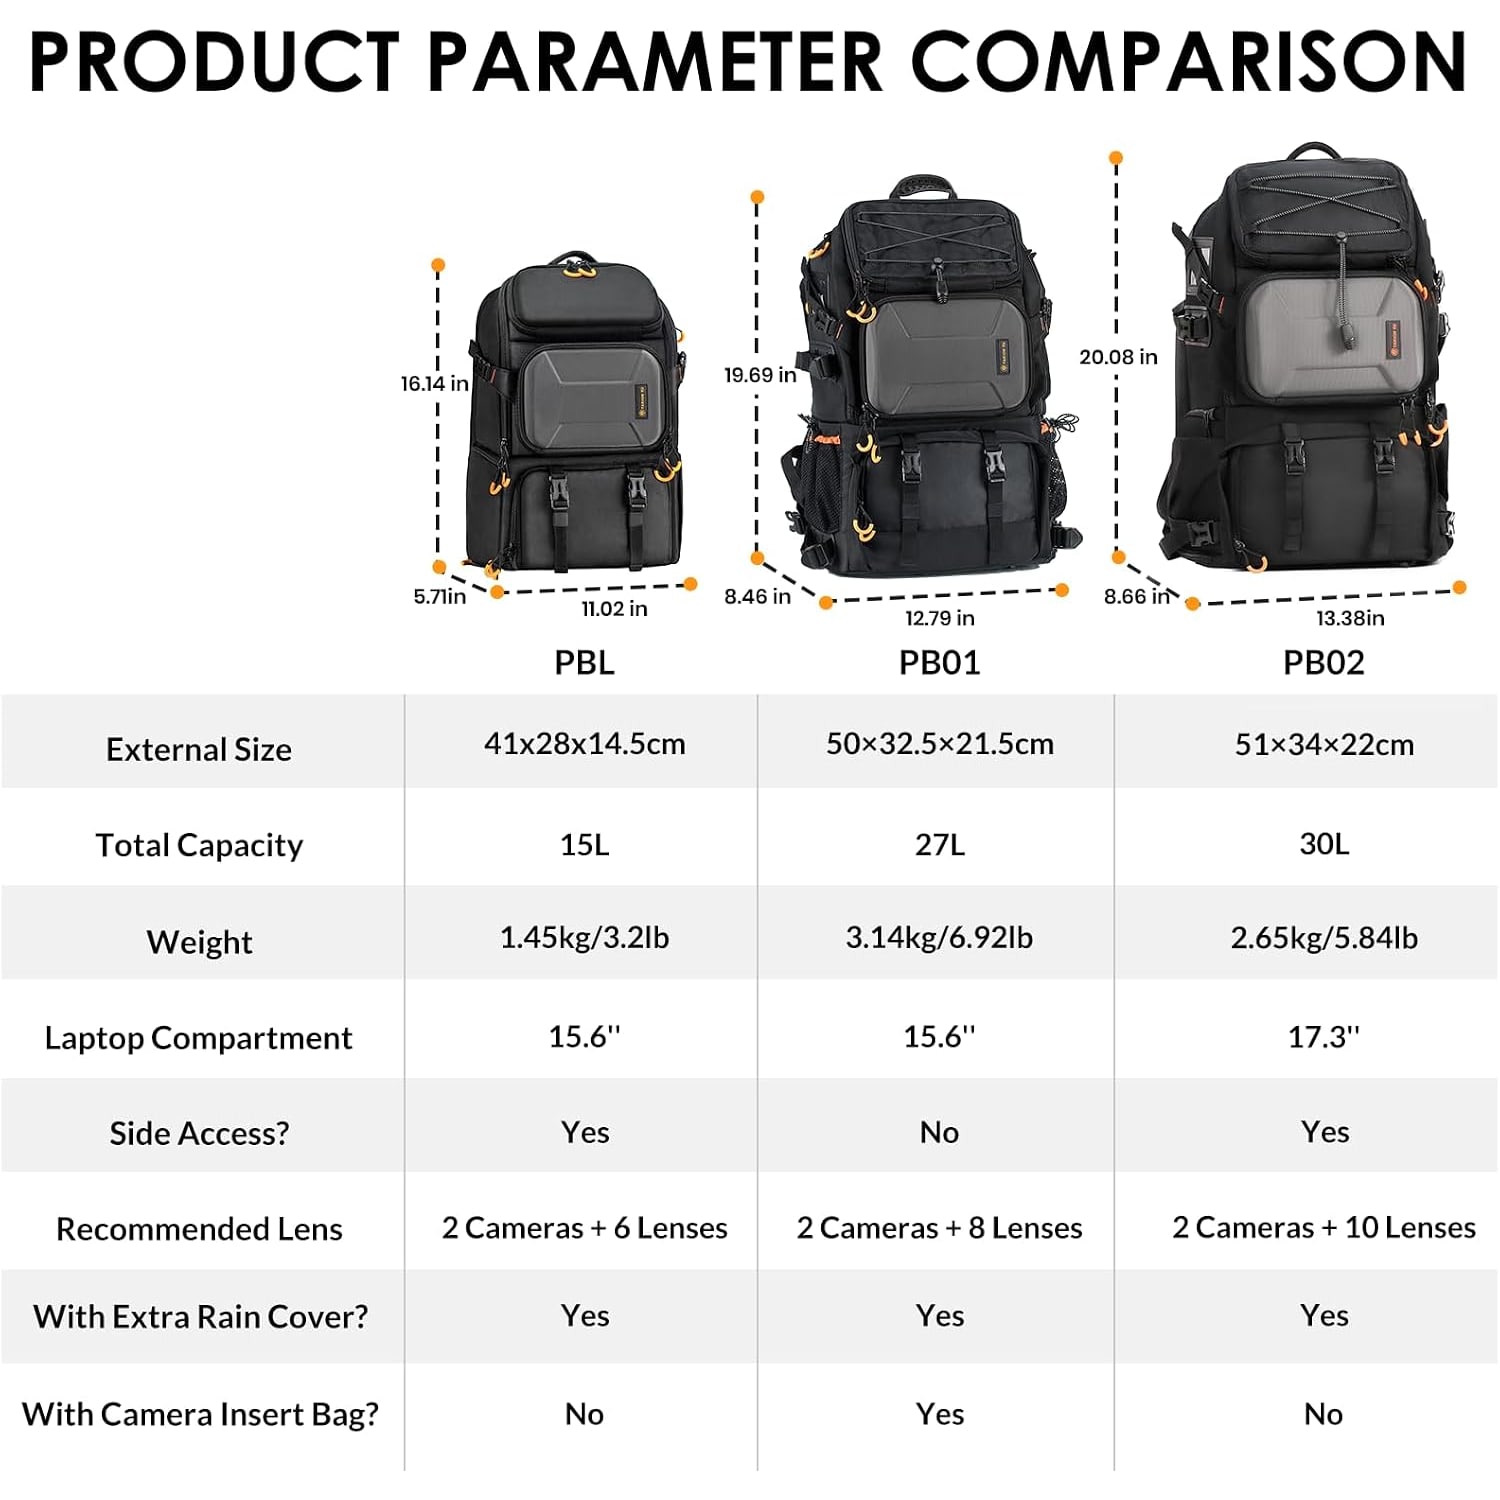
The shell is high density nylon, used for both the outer and the lining, chosen for tear resistance and water repellency. It is a soft shell rather than a rigid case, so the pack keeps its shape through internal padding instead of a hard frame. Empty it weighs 1.45 kg, which is in the sensible middle. Lighter packs usually sacrifice padding. Heavier ones start to punish you on a long walk.
The outside measurements are 18.8 cm deep, 28.4 cm wide and 40.9 cm tall. That is a compact footprint. It sits between the shoulder blades rather than sprawling past the hips, and it does not look out of place in an office or on a crowded train.
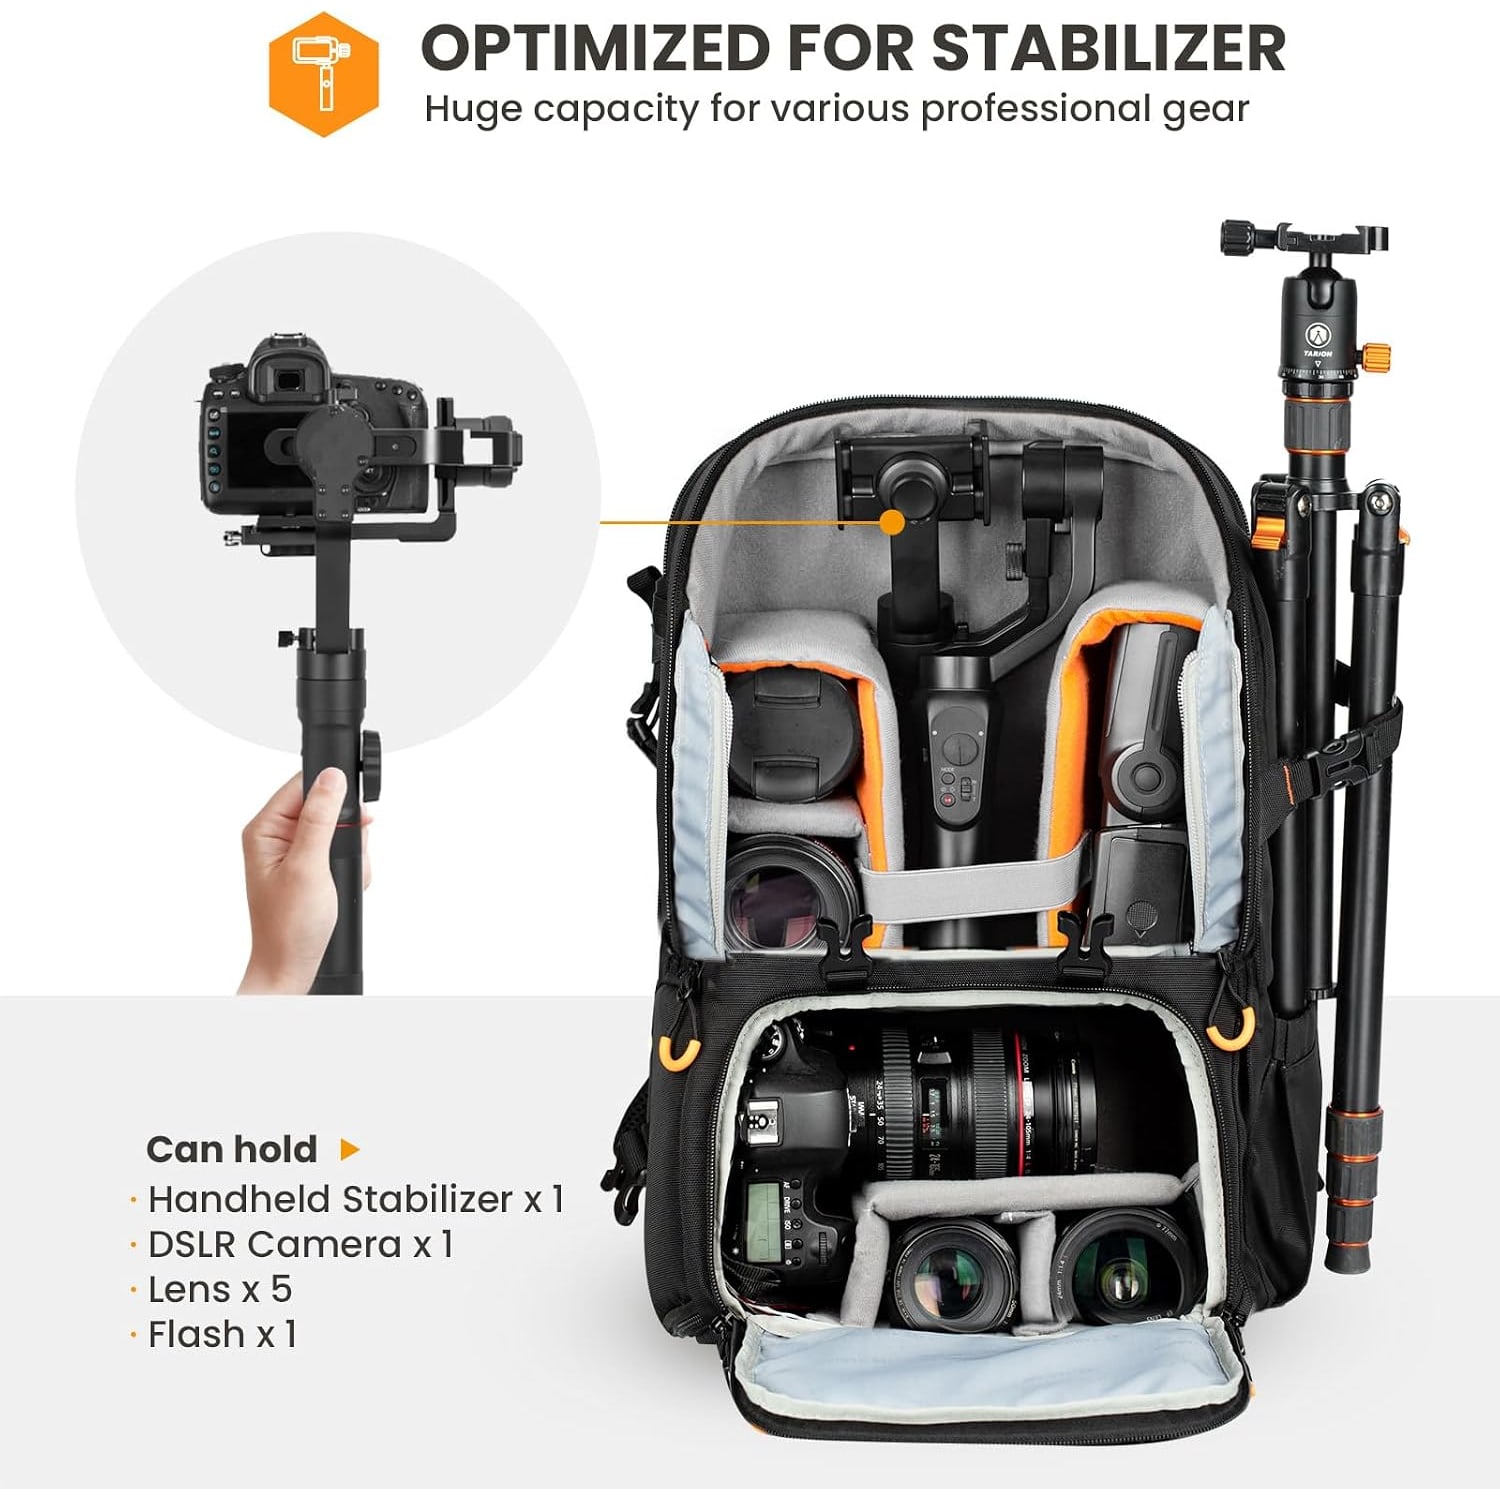
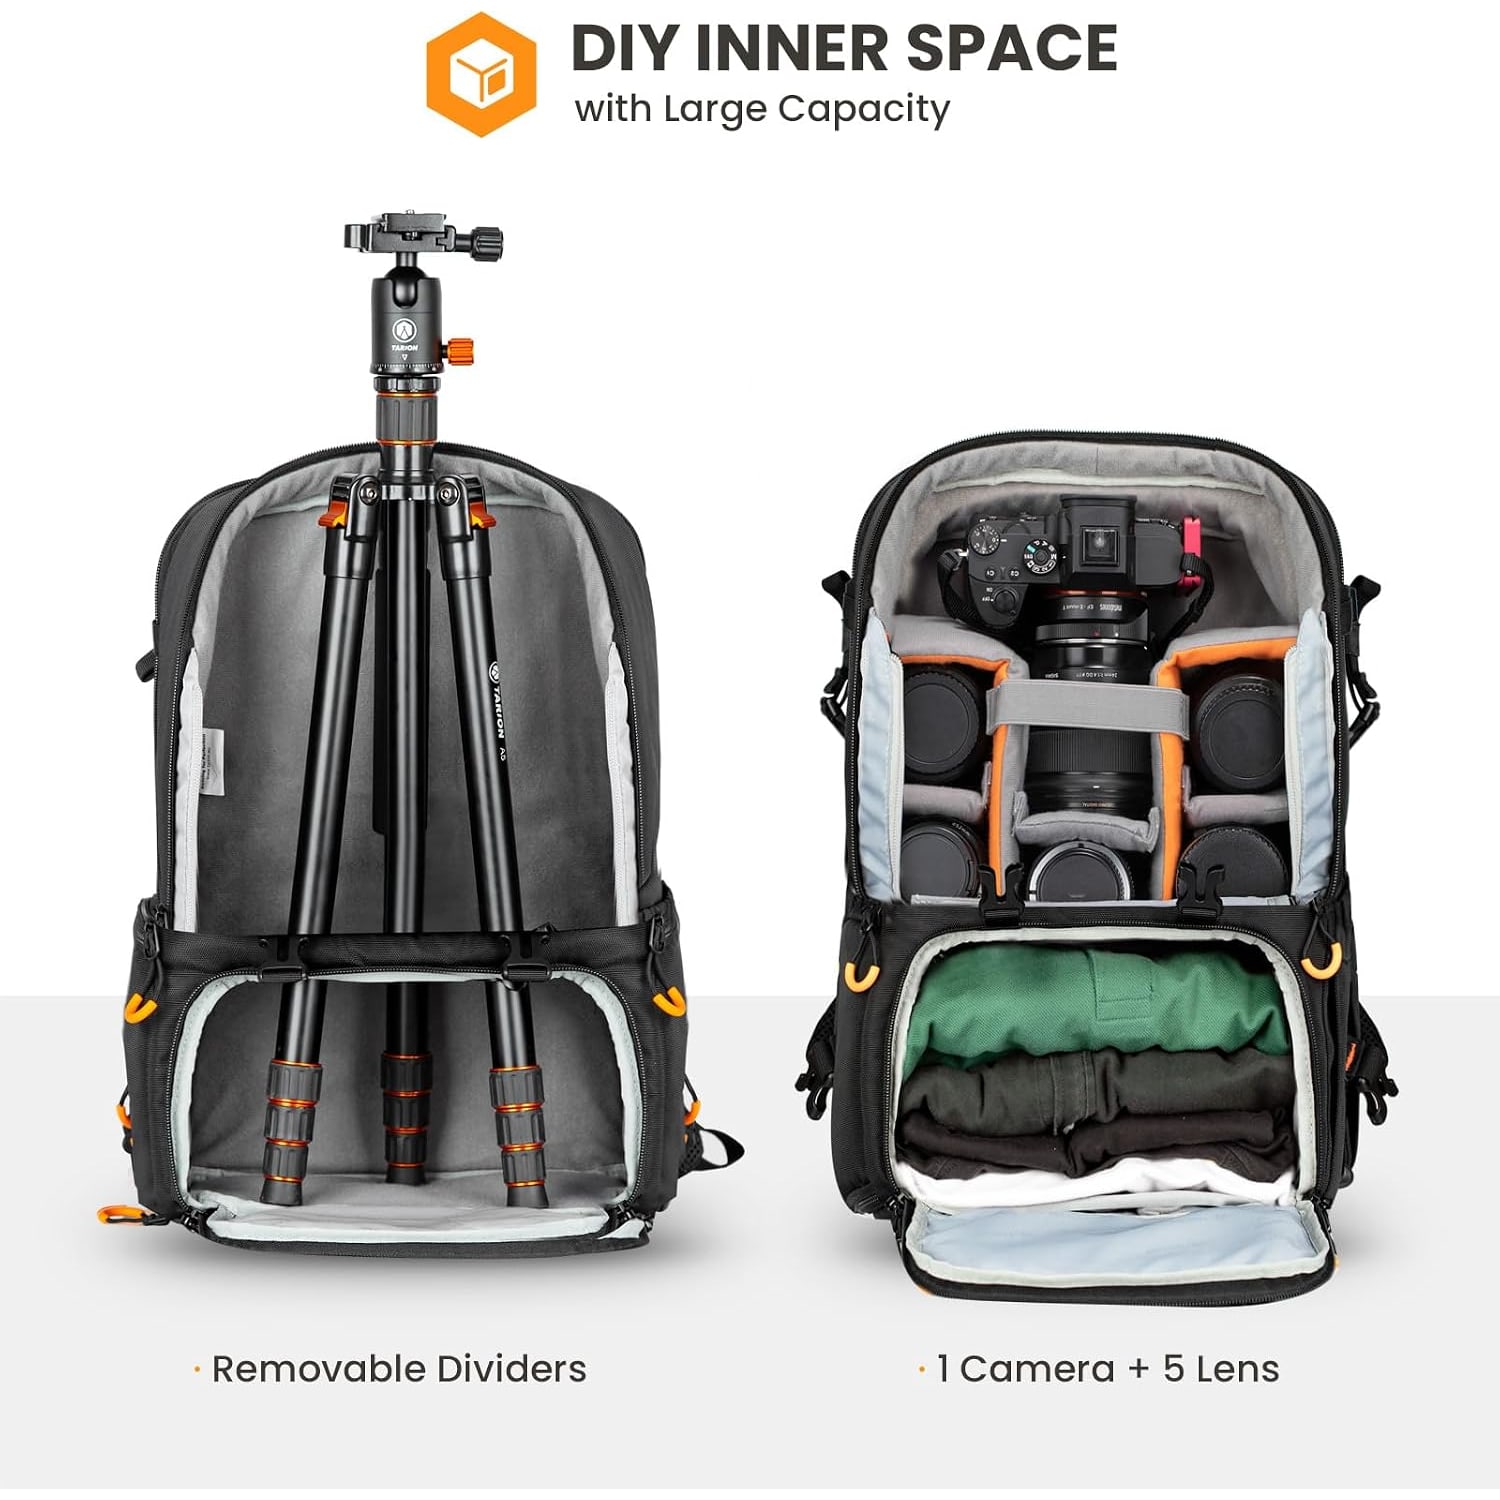
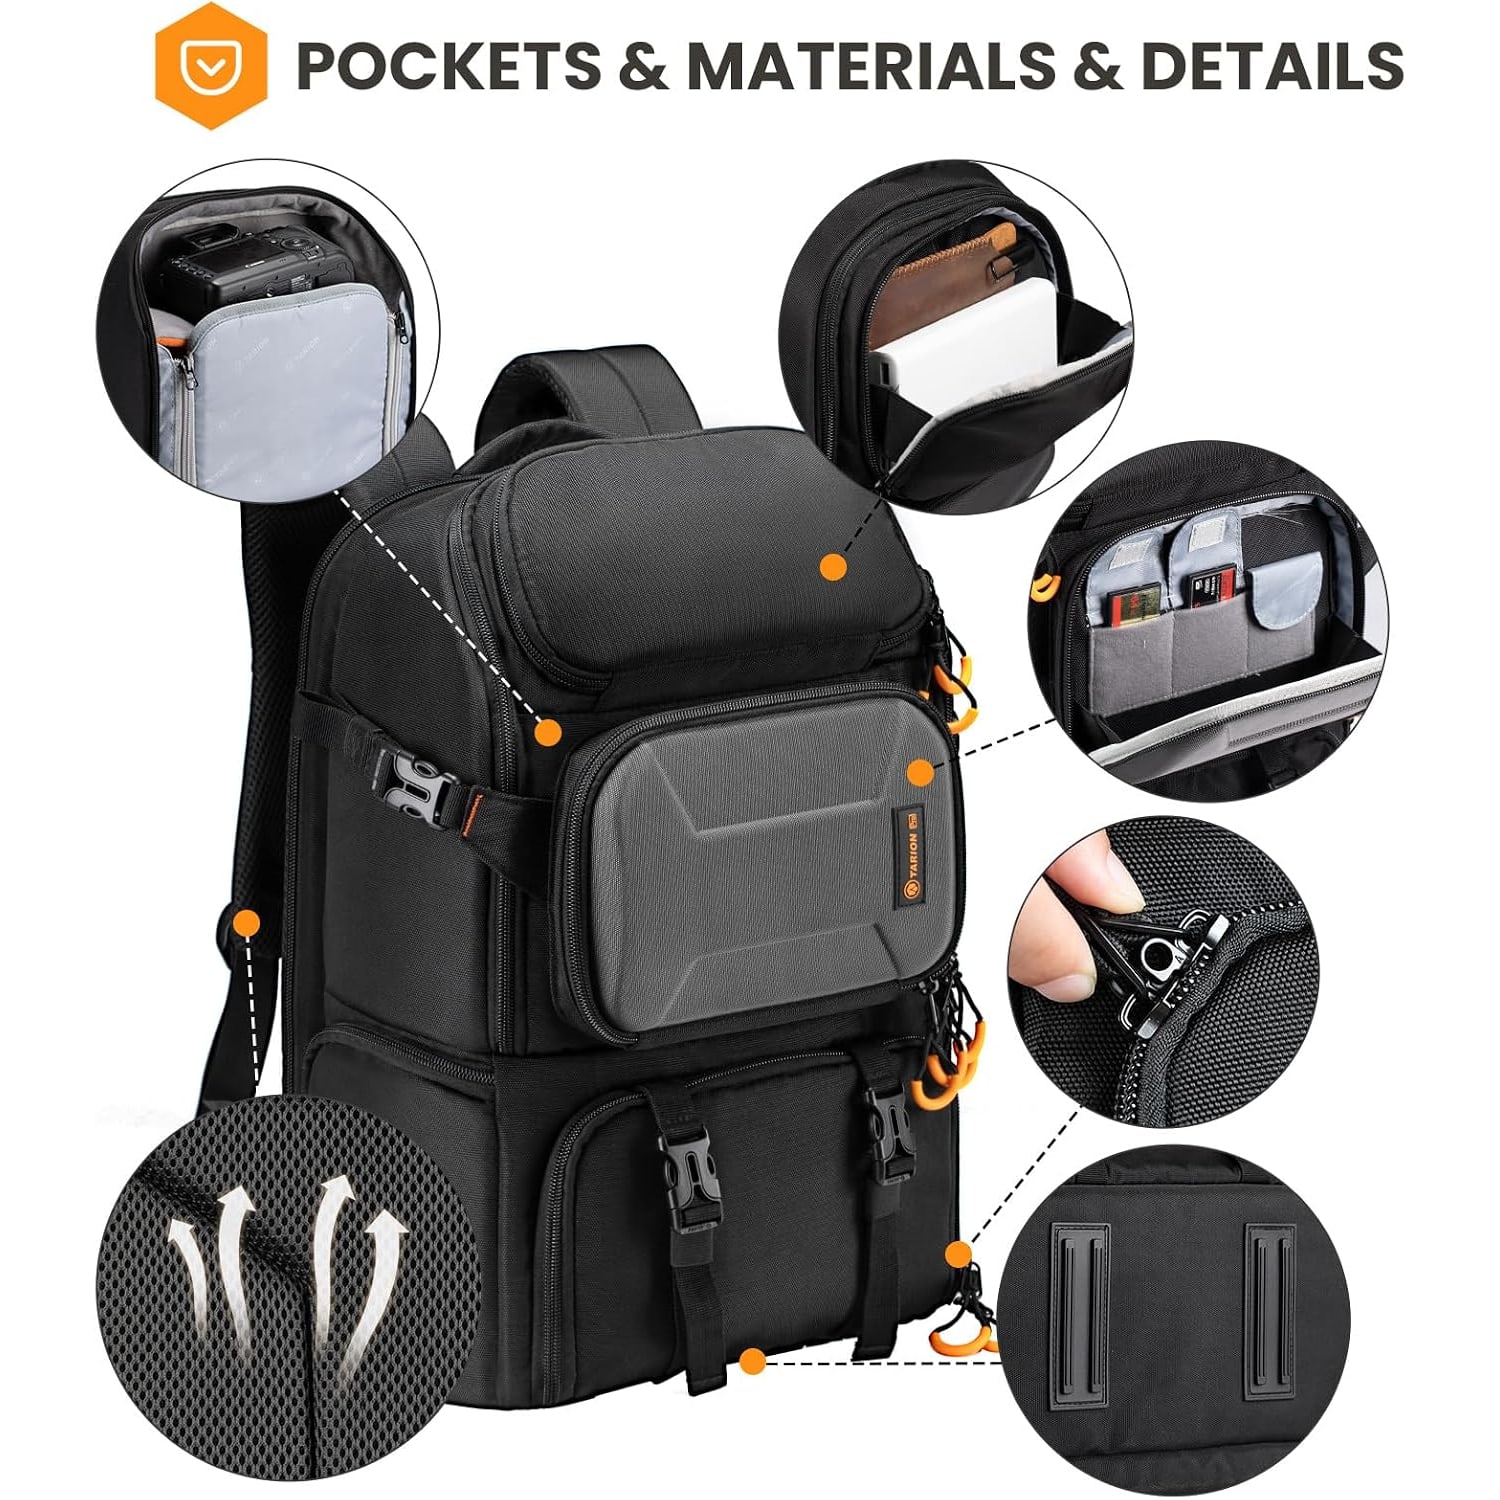
Inside, the stated storage volume is 14.7 litres spread over nine compartments, with four pockets for the small things. The main camera area uses thickened padded dividers that you can move, take out or rearrange. Most owners settle on three or four lens slots with a body in the middle. The useful trick is that the divider separating the top and bottom sections can come out entirely, leaving one tall cavity. That is where a handheld stabiliser, a small folded drone, or just a jumper and a bottle of water ends up on lighter days.
At the back there is a dedicated sleeve for thin laptops up to 15.6 inches. Putting the laptop in its own compartment against your spine does two useful things. It keeps the heaviest flat object closest to your centre of gravity, and it stops a laptop edge pressing into a lens barrel.
On one side sits a pocket with supporting straps, meant for a tripod. It takes a water bottle just as happily. The back panel is padded air mesh, which creates a gap between the pack and your shirt so some air can move. In high humidity that will not keep you dry, but it is noticeably better than flat foam sitting against your back on a walk from the MRT station.
Who this suits
If you shoot with one body and a handful of lenses, this is about right. A standard zoom, a prime, a telephoto and maybe a wide, plus the body, fit the 15 litre space without forcing anything. Add the laptop and you have a complete travel kit in a bag you can carry all day.
It suits the commuter photographer particularly well. You take it to the office with a laptop, a notebook and one lens, then on Saturday you pull the laptop out, add dividers and it becomes a proper photography backpack for travel and day trips.
Hikers and trekkers are an obvious fit too, given the air mesh back, the even weight distribution and the rain cover. For a hiking camera backpack this size, the main thing is discipline about what you pack, since 15 litres rewards people who leave the fourth lens at home.
It is less suitable if you work with two bodies permanently attached to lenses, carry large lighting gear, or need to fit a 70 to 200 mm lens alongside a full second kit. That is where the larger 27 litre model in the same series makes more sense. The two sizes exist precisely because those are different jobs.
How to choose between sizes and styles
Start with a tape measure, not a wishlist. Lay your actual gear on a table in the arrangement you would use, measure the stack, and compare against 18.8 by 28.4 by 40.9 cm minus a couple of centimetres for padding. People consistently overestimate how much they need and then carry an oversized bag half empty, which is uncomfortable and makes the gear slide.
Next, decide how often you need the camera out. If it is once or twice a shoot, top loading is fine. If it is constantly, side access becomes the feature you judge everything else by. For street, markets, wildlife and anything with children in it, a camera backpack with side access earns its keep in the first hour.
Then think about the laptop. If you edit on the move, the 15.6 inch sleeve matters. If you never travel with a computer, you gain a flat storage pocket instead for documents, a tablet or a light rain jacket.
Finally, weigh up the weather. Water resistant nylon handles spray, mist and a short walk through drizzle. A full tropical downpour needs the cover. Practise getting the cover on once at home so you are not fumbling with it on a pavement with your camera exposed.
Looking after it
Care is straightforward and the one rule that matters is hand wash only. No washing machine, no dryer. Empty every pocket, including the small ones that collect lens caps and receipts, then wipe the nylon down with a damp cloth and a little mild soap. Rinse the cloth often rather than soaking the bag.
Drying matters more than cleaning in this climate. Let the pack air dry fully in a shaded, airy spot before you put it away. Never fold a wet rain cover back into its pocket, because that is how mildew starts and the smell is hard to get out. Hang the cover separately until it is bone dry.
Store the bag somewhere with airflow rather than sealed inside a cupboard. A silica gel pack tucked into the main compartment helps on humid floors. Give the padded dividers a brush with a dry soft brush now and then, since dust that gathers on hook and loop strips stops them gripping properly.
Zips benefit from an occasional clean too. A dry toothbrush along the teeth removes the grit that causes a zip to snag, which is the most common way a good bag ends up retired early.
The short version
This is a 15 litre pack for a photographer who carries one body, a few lenses and a laptop, and who wants to get at the camera quickly without putting the bag down. You get repositionable padded dividers across nine compartments, four accessory pockets, a 15.6 inch laptop sleeve, a tripod side pocket with straps, an air mesh back panel and a rain cover, in a nylon shell weighing 1.45 kg.
Choose it if you want a compact, weather-ready bag that works for the office commute and the weekend trail. Choose the larger 27 litre version if you regularly carry two bodies or longer glass. Measure your kit first, and the decision usually makes itself.